Sealing the Masterpiece: A Complete Guide to Varnishing and Protecting Oil Paintings
Art Team
June 7th, 2026
No Comments
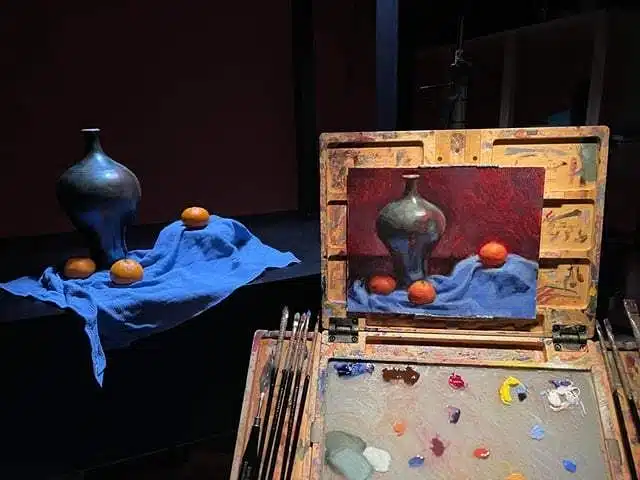
Oil Painting Varnish Guide
Introduction: Why Oil Paintings Need Protection
An oil painting may feel “finished” when the last brushstroke dries to the touch, but its life on the wall is just beginning. Over time, dust settles on the surface, airborne pollutants react with the paint film, and handling marks accumulate at the edges. Without a protective barrier, the painting’s surface is directly exposed to all of this.
Varnish acts as a sacrificial layer: it takes the scratches, dust, and UV exposure so the paint underneath doesn’t have to. If the surface ever becomes too dirty or yellowed, an experienced conservator can remove and replace the varnish while leaving the original paint layer intact.
Besides protection, varnish also unifies surface gloss, deepens dark values, and can subtly saturate color. Dull areas (sometimes called “sinking in”) often spring back to life once a final varnish is applied.
I. Timing and Selection
1. When Is an Oil Painting Ready to Be Varnished?
Timing is critical. Even if the surface feels dry, the paint film underneath can still be curing and flexible. Applying a non‑breathable final varnish too early can trap solvents and slow or distort that curing process.
A common guideline is:
Thin oil layers on an absorbent ground: wait at least 6 months.
Thick, impasto, or layered works: 6–12 months, sometimes longer.
If you need to exhibit sooner, use a retouch varnish (a thin, breathable resin) rather than a full final varnish. Retouch varnish can even out gloss temporarily and still allow the painting to continue curing.
2. Types of Varnish: Traditional and Modern Options
2.1. Natural resin varnishes: Traditional products like damar create a hard, glossy film but can yellow or become brittle over time.
2.2. Modern synthetic varnishes: Acrylic or ketone‑based varnishes are resistant to yellowing and easier to remove.
2.3. Spray vs. brush‑on varnish: Brush-on offers controllable thickness; spray is ideal for textured or impasto surfaces.
3. Choosing Gloss, Satin, or Matte
Gloss maximizes color depth but can produce glare. Satin offers a middle ground. Matte softens reflections but can slightly “flatten” values if overused. Always follow brand instructions when mixing products to customize sheen.
II. The Varnishing Process
1. Preparing the Painting for Varnishing
Choose a dust‑free, well‑ventilated area. Place the painting horizontally to reduce drips. Gently wipe the painting with a soft, lint‑free cloth to remove surface dust before starting.
2. Tools and Materials You’ll Need
You will need your chosen varnish, a clean tray, a wide soft brush (reserved for varnish), lint-free cloths, gloves, and a dust “tent” or cover to protect the work while drying.
3. How to Apply Brush‑On Varnish Step by Step
Stir, don’t shake: Avoid introducing bubbles.
Decant into a shallow tray: Limits air exposure.
Load and wipe the brush: Should be loaded but not dripping.
Apply a thin, even coat in one direction: Start at one corner and use long, smooth strokes.
Cross‑stroke for leveling: Turn the painting 90 degrees and go over the wet layer.
Do not overwork: Resist the temptation to go back over wet areas to avoid streaking.
Protect from dust while drying: Place a dust tent over the painting.
4. Applying Spray Varnish Safely
Work in a well-ventilated space. Shake the can as directed and test on scrap material. Hold at the recommended distance and apply several very thin coats rather than one heavy coat, allowing drying time in between.
III. Technical Considerations and Troubleshooting
1. How Many Coats Do You Need?
Most brands advise one to two thin coats. A second thin coat improves uniformity and protection. Avoid heavy, thick layers as they are harder to remove during future conservation.
2. Retouch Varnish vs. Final Varnish
Retouch varnish is a lighter, permeable coating used to revive sunken areas or provide temporary protection for uncured works. It is not always intended as a long‑term protective layer.
3. Common Varnishing Problems and How to Avoid Them
Cloudy or milky varnish: Often caused by moisture or thick layers.
Bubbles: Result from shaking or aggressive brushing.
Streaks: Result from uneven thickness; cross-hatching helps level the surface.
Dust: Prevent by cleaning the workspace and using a dust tent.
4. Varnishing on Panels vs. Canvas
Rigid panels are better suited for brittle traditional varnishes. Stretched canvas requires modern, flexible synthetic varnishes to prevent cracking caused by the movement of the support.
IV. Maintenance and Safety
1. Removing and Replacing Old Varnish
Conservation advantages allow varnish to be removed with solvents if it yellows. However, because this procedure risks harm if handled incorrectly, full varnish removal is best left to trained conservators.
2. Displaying and Storing Varnished Oil Paintings
Avoid direct sunlight and maintain stable temperature and humidity. Dust gently with a soft brush. For storage, keep works upright and separate them with non-abrasive materials.
3. Health and Safety Considerations
Work with good ventilation and wear gloves. Avoid open flames near solvent vapors and dispose of solvent‑soaked rags safely, as they can be flammable.
V. Mastery and Workflow
1. Integrating Varnishing into Your Overall Workflow
Varnishing supports the whole lifecycle of your painting. Complete the work, let it dry, apply retouch varnish if needed for exhibition, allow full curing over months, and then apply the final varnish.
2. Quick Reference Checklist
Before you varnish, verify: curing time, solvent test, clean workspace, varnish type, dedicated tools, and a plan for dust protection.
Confused by acrylic mediums? Learn what gels, fluids, retarders, and other additives actually do, how brands differ, and which ones are genuinely useful for your painting style.
Struggling to pick between watercolor, acrylic, or oil? Learn how drying time, control, and personality traits like patience and pace determine which paint medium is the best fit for you.
Discover the history, techniques, and practical tips behind en plein air painting. Learn how to capture spring’s fleeting light and color with confidence and authenticity.
Learn what linseed oil does in oil painting, the different types available, how to use it safely with the fat-over-lean rule, and when to keep your mixtures simple.
Learn how to properly seal and prime raw wood panels for acrylic and oil painting. Step‑by‑step instructions on using Golden Gloss Medium, applying gesso, sanding, and preventing yellowing and warping.
Stuck in perfectionism or artist’s block? Learn how to use sandpaper, wire brushes, scraping, and distressed gesso as “surface alchemy” to reveal layers, add depth, and free up your painting…
Learn exactly how to stretch watercolor paper so it stays flat under heavy washes. Tools, soaking times, taping methods, drying tips, and common mistakes explained.