Stretching Watercolor Paper the Right Way: A Step‑by‑Step Guide to Flat, Warp‑Free Washes
Art Team
June 7th, 2026
No Comments
Stretching Watercolor Paper: A Comprehensive Guide
Introduction: Why Stretch Watercolor Paper at All?
Watercolor paper is made of plant fibers—usually cotton or wood pulp—that expand when wet and contract as they dry. When you apply a generous wash, these fibers swell unevenly across the sheet, causing waves and buckles. Once dry, those distortions can stay locked into the paper surface.
Stretching pre‑expands and fixes the sheet to a rigid support so that as it dries, it pulls tight like a drumhead instead of curling or cockling. The result: Flat surfaces even under heavy, juicy washes; better control over gradients and edges; and a more professional finish, especially for framed work.
The technique may seem like an extra chore at first, but for larger formats or wet‑in‑wet techniques it can radically improve your painting experience.
I. Basics and Tools
1. When Do You Need to Stretch Watercolor Paper?
Not every sheet needs stretching. Whether you should depends on weight, size, and your painting style. 140 lb / 300 gsm paper often benefits from stretching, especially in sizes above A4. Heavier papers (200–300 lb) are much more resistant to warping. If you regularly paint with large skies, multiple glazing layers, or wet-into-wet techniques across the whole sheet, then learning to stretch paper is worth the effort.
2. Tools and Materials You’ll Need
For the most common stretching methods, you’ll need: Watercolor paper, a rigid board (Plywood, MDF, or gatorboard), a clean tub or tray for soaking, clean room-temperature water, a sponge, and brown gummed tape (water‑activated) or staples/pins.
II. Primary Stretching Methods
1. Method 1: Classic Soak-and-Tape Stretch
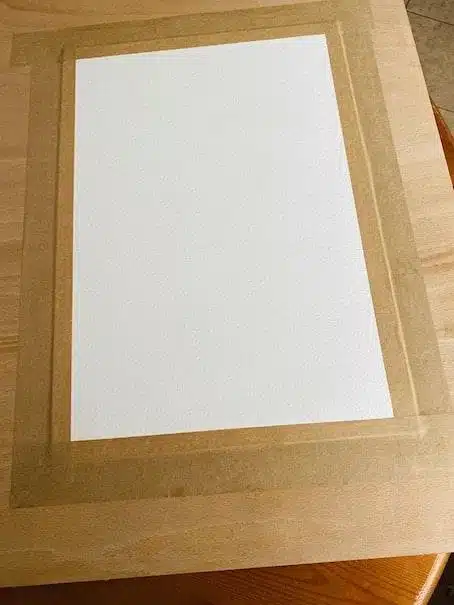
This is the most widely taught traditional method. Fill a clean tray with water and soak the sheet (3–5 minutes for 140 lb paper). Drain and blot the paper so it is damp, not dripping. Lay the sheet on your board, smooth air bubbles from the center outward, and apply moistened gummed tape along all four edges. Allow the sheet to dry flat and completely, which may take several hours or overnight.
2. Method 2: Sponge-Wetting and Taping
An alternative when you lack a big tray. Fix the dry sheet lightly to the board with masking tape. Use a clean sponge or large brush to apply water evenly across the front surface, then flip and repeat on the back until the sheet relaxes and lies flat. Remove temporary tape and proceed with gummed tape as in Method 1.
3. Method 3: Stapling or Pinning Instead of Tape
Soak the paper as in Method 1, then lay it on the board and smooth it. Use a staple gun or drawing pins around the edges, spacing them every 3–5 cm. This provides a very secure hold for large or heavy sheets but leaves small holes around the edges which are usually hidden by matting or trimming later.
4. Method 4: Stretcher Frames / Watercolor Stretcher Systems
Some artists use specialized stretcher systems that clamp the edges of the paper into channels. These are reusable and avoid tape waste or glue residue, making them a time-saving investment for frequent watercolorists.
III. Best Practices and Troubleshooting
1. How to Know the Paper Is Stretched Correctly
Well‑stretched paper should feel taut and firm when tapped—almost like a drum. It should lie flat with no visible waves and resist buckling when you paint a broad wash across it. Severe buckling usually indicates the paper wasn’t wet evenly, the tape didn’t adhere, or the board warped.
2. Common Problems and How to Fix Them
Tape Peels Up: Often caused by too much water on the tape or an unsealed board. Use just enough water to activate adhesive and ensure boards are sealed with acrylic medium.
Paper Still Buckles: Caused by insufficient soaking or uneven wetting. Ensure full immersion and wet both sides evenly.
Surface Feels Fuzzy: Often due to over-soaking in warm water or aggressive scrubbing. Reduce soak time and use cooler water.
3. Environmental Considerations
Humidity and temperature influence drying. In very humid climates, paper takes longer to dry. In very dry climates, drying can be too rapid, increasing the risk of edge tearing. A controlled environment yields the most consistent results.
IV. Painting and Removal
1. Painting on Stretched Paper
Once dry, you can paint as usual. Avoid soaking the paper again while painting. When working very wet, tilt the board gently to guide flow. Properly stretched paper allows heavy washes and reworking without worrying about the sheet pulling away from the board.
2. Removing the Finished Painting from the Board
With gummed tape, use a sharp craft knife and a metal ruler to cut just inside the inner edge of the tape. Trying to peel gummed tape off the paper often damages the surface. With staples or pins, carefully remove them and decide whether to trim the perforated edge or hide it with a mat.
3. Alternatives If You Don’t Want to Stretch
Options include using watercolor blocks (glued on all sides), choosing heavier paper (300 lb) that naturally resists buckling, or working on smaller sheets which buckle less.
V. Integration and Specialized Techniques
1. Stretching Different Paper Types
100% cotton papers are strong and stretch well. Wood pulp/cellulose papers are more delicate and require shorter soaks. Hot-pressed paper is smoother and more sensitive to surface damage, so be extra gentle when blotting.
2. Integrating Stretching into Your Workflow
Treat stretching as a batch preparation step. Once a week or month, stretch several sheets on multiple boards. Let them dry and stack them safely. This separates the technical prep from the creative session.
3. Stretching for Specific Techniques
Certain styles benefit especially from stretched paper: big wet skies, detailed botanical work with many glazes, and experimental techniques like salt or splattering. A stretched base keeps these water-heavy methods controlled.
Discover the history, techniques, and practical tips behind en plein air painting. Learn how to capture spring’s fleeting light and color with confidence and authenticity.
Learn the core principles of perspective drawing with clear explanations, visual logic, and practical steps to create convincing spatial depth in your art.
Struggling to blend acrylics before they dry? Learn wet-on-wet, wet-on-dry, glazing, brush and medium choices, drying-time tricks, and step-by-step exercises for smoother blends.
1. Invisible Armor: How to Protect Your Artwork Online Through Watermarking and Copyright Control 1.1. The Hook: The Digital Mirage You upload a painting you spent weeks perfecting—a swirl of…
Learn when and how to varnish oil paintings, choose the right varnish, and protect your work from dust, UV light, and aging for long‑term preservation.
New to sgraffito? Learn what it is, how it works in acrylics and oils, which tools to use, and step‑by‑step projects to start scratching through paint for bold texture and…